| Table of Contents |
|---|
Customization Module 7-Speed DCT
xHP has a "Customisation Module" which allows the user to change certain settings before flashing an OTS or Custom Map. The module injects these user-defined values into each map before it is flashed.
Use is simple:
adjust the desired settings
save them
flash any map to apply the settings.
The 7-speed is a very different gearbox to the 6 and 8-speed units. Manufactured by Getrag, it basically consists of two parallel manual gearboxes, each with a clutch. A gear change is made by pre-selecting the target gear in the adjacent transmission and then opening/closing both clutches at the same time. As one clutch opens, the other closes at the same time, allowing the transmission to make "seamless" shifts. BMW has been using it for about 10 years, mostly in M cars and some of the sportier AG cars, such as the 335is E92 and Z4 sDrive 35i. While its raw upshift performance is unparalleled, it has its drawbacks in everyday driving compared to the 6 and 8-speed torque converter transmissions.
For example, spontaneous multi-speed downshifts at cruising speeds are much quicker with the 6 and 8HP, and manoeuvring in tight spaces is also much easier with the ZF units. Last but not least, the DCT is much harder to adapt to different power levels and requires more set-up work when mated to different engines.
You must flash your car after changing settings. Simply being connected to the car is not enough.
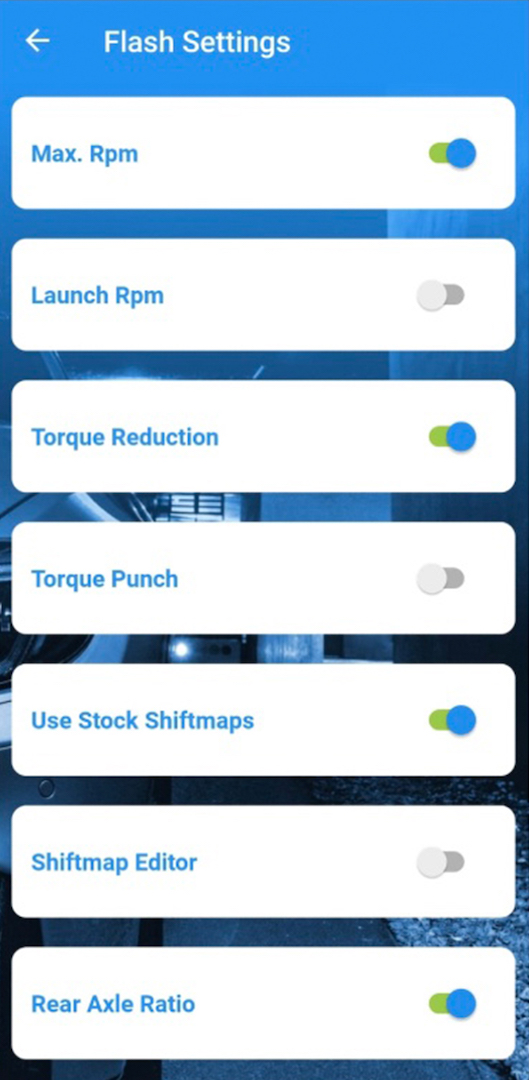
You can access the module via the Flash Settings button at the bottom of the Map Flash screen. Please note that the module is not available for all vehicles and/or engine/gearbox combinations.
| Info |
|---|
To see what custom features your specific car can support, connect the app to your car and click on it. Then click on the blue 'flash' icon in the bottom right corner and then click on the gear icon to see what features your car supports. This can be done without purchasing a licence. |
Launch Control Setup
xHP allows you to fully configure the launch control function of your DCT. xHP allows you to change the launch speed, as well as advanced settings to control engine torque and allow slip during acceleration. The standard values are set for a stock car. Especially for heavily modified cars with sticky tyres, big turbos etc. these values need to be adjusted up/down for optimal acceleration.
| Info |
|---|
Non-M cars (335i, Z4 etc.) use a simpler form of launch control. These cars can only adjust the launch RPM. Controlling engine torque and slip values through the DCT is not possible on these cars as they use the normal DTC function to control launch instead. |
.png?version=1&modificationDate=1623235589656&cacheVersion=1&api=v2&width=566)
.png?version=1&modificationDate=1623235589656&cacheVersion=1&api=v2&width=564)
.png?version=1&modificationDate=1623235599079&cacheVersion=1&api=v2&width=566)
.png?version=1&modificationDate=1623235599079&cacheVersion=1&api=v2&width=564)
Min: The minimum engine speed (RPM)can be adjusted in the car using the cruise control up/down buttons.
Base: The initial RPM that Launch Control targets when activated.
Max: The maximum RPM can be adjusted in the car using the cruise control up/down buttons.
Desired Slip at Rear-Wheels (DS): In a nutshell, this slider makes the wheels spin more or less during the launch. Move it to the right for more wheel spin, and move it to the left for less wheel spin. The desired slip is the main variable used by the Launch Control to regulate engine and clutch torque during launch.
The DCT calculates the actual slip during launch by reading the front/rear wheel speed sensors around 30 times per second and adjusts the engine torque and clutch slip to achieve the pre-programmed values. The optimum slip depends on many factors such as climate, tyres, road surface, suspension setup, etc.
BMW has set this for a standard car on an "average" road surface. As a rule of thumb, on wet roads or in cold climates (winter), lowering the slip values will probably give you better times.
On the other hand, on grippy surfaces (e.g. drag strip or new country road) and tyres, higher slip values can generate more traction.Torque Initial Slip-Phase (TI): This slider adjusts the initial torque when the LC releases the clutch. It affects how aggressively the clutch is released and how much boost your engine will target in the first few moments. This phase is crucial for a good start as it loads the drivetrain, sets the car's springs and gets the tyres spinning. Immediately afterwards, the LC will start to regulate based on the "desired slip". Too much torque will just burn rubber and the LC will have to adjust downwards a lot in the first ~1.5 seconds. Too little will result in a weak launch.
Torque after Slip-Phase (TAS): This setting adjusts the second part of the launch, approximately 1.5 - 2.5 seconds after starting, when second gear is engaged. Shifting from 1st to 2nd can make the car unstable. Too much torque will cause the wheels to spin immediately on a 1-2 shift (which the LC will then have to counteract based on the "Desired Slip"), too little will waste time on pulling into 2nd gear as the engine may not be targeting full boost instantaneously, even if the traction is there to put all the power to the ground.
| Info |
|---|
SETUP-HINTS: The TAS can be adjusted with bolder increments, as the car is already loaded when this setting kicks in and will produce similar traction within a wider slip window. Be prepared for wheel slip and the car going sideways as you lift. The typical FBO car with Stage 2 engine mapping should be fine with the settings stored in our OTS maps. Depending on the traction available, it may even benefit from a few ticks to the left on the TAS slider. Lowering your M-Car to the max and running 21" tyres may look cool, but the traction will be terrible. So lowering all sliders by a few percent will probably give you better times. Please don't ask us what the "optimum" settings are. If there was an optimal setting, it would already be programmed into the OTS map. If you want better times, you have to change, measure, change, measure and so on. Of course, Launch Control will put your clutches through their paces. Running Launch Control 50 times comes with a price tag, whether you change the values or not. |
The DCT Launch Control can only be used if all of the following conditions are met
1000m have been travelled since the last Launch Control start.
60 seconds have elapsed since the last Launch Control start.
there is no trailer attached to the car (yes, this will be checked)
the parking brake (E-brake) is not applied
The transmission is not in hot mode: yellow or red
The procedure for activating Launch Control is the same as for stock cars.
Torque Punch
This option allows the user to configure the amount of torque that is added on each shift in Sport/Sport+ and DSC OFF modes (AG cars) and S2/S3/M2/M3/DSC OFF (M cars).
During an upshift, the transmission sends a request to the engine to reduce power briefly to ease the shift. The time frame for this is about 100 - 200 msec. Depending on the amount of torque drawn during this short period, the transmission calculates the pressure required by the clutches to complete the shift. The Torque Punch setting allows you to add a factor to this calculated pressure to create a more aggressive (or tame) shift.
The punch can be felt in the car as a slight forward pull during the shift.
Slider to the right means a harder shift!
Slider to the left means a softer shift!
This custom option interacts directly with the “Torque Reduction” option. (see below) ⚙️
Torque Reduction
During each shift the transmissions orders the engine to cut power, while the transmission is pulling down to the Target-RPM for the next gear. The amount of torque reduction has to correlate with the clutch timing and torque at the clutches to create a quick, consistent and reliable shift, within the clutch specifications.
On high power cars, the DCT often suffers from “spongy” and delayed shifts, which are a direct effect of de-calibrated torque models inside the DME and unadjusted transmission mapping. The DCT is very picky and not that flexible in terms of self-adjustment and may need further adjustment through options “Torque Punch” and “Torque Reduction”, depending on your engine mods. If your Tuner asks how to “adjust for xHP”, just tell him to leave the Load-2-Torque Calculation as close to real-world as possible.
Slider to the right means “more reduction” → The transmissions transmission pulls out more power during the shift.
Slider to the left means “less reduction” → The transmission pulls less power during a shift.
Setup hints: A proper shift needs things to be in balance. Just lowering down torque reduction as much asDuring each shift, the transmission instructs the engine to reduce power as the transmission pulls down to the target RPM for the next gear. The amount of torque reduction must correlate with the clutch timing and torque at the clutches to produce a quick, consistent and reliable shift within the clutch specifications.
In high-performance cars, the DCT often suffers from 'spongy' and delayed shifts as a direct result of de-calibrated torque models in the DME and unadjusted transmission mapping.
The DCT is very picky and not very flexible in terms of self-adjustment and may need further adjustment via the Torque Punch and Torque Reduction options depending on your engine mods.
If your tuner asks how to "adjust for xHP", just tell them to keep the load-2-torque calculation as close to reality as possible.
Slider to the right means "more reduction" → the gearbox will extract more power when shifting.
Slider to the left means "less reduction" → the gearbox draws less power during a shift.
Setup hints:
A good shift needs to be balanced. Simply turning down the torque reduction as much as possible is not a general recipe. If you feel are experiencing the infamous “spongy” "spongy" shifts, try to raise increasing the torque reduction (pull pulling more torque during the shift) and raise increasing the Torque Punch at the same time. Do this gradually, as when overdone you get overdoing it will have the opposite effect. Please do not ask us “what "what is the best setting”setting". If there was one, we we would have done made the OTS Maps already maps that way already.
Use Stock Shiftmaps
Our OTS Maps often sport adjusted Shift-Points in the various modes. If you do like the stock Shift- Points better, just activate this option.This option will always keep the stock shift points, no matter which map you flash.
With this feature enabled, changes in the Shift Map Editor will be relative to the stock shift maps, not the shift maps of any OTS map you may have flashed!
Max. RPM
The AG -Cars cars (335i, Z4) have different Target-RPMs target revs for D-, S- and M-Mode when applying modes at full throttle. Instead of shifting at a certain specific vehicle speed, the transmission shifts at a fixed RPM per rpm for each gear. With this This option you can adjust that RPM target allows you to set this target RPM for each mode and each gear. Please note, Note that the transmission adds does some pre-calculation, so it still may shift a bit earlier, then setup little earlier than set in this panel. For instanceexample, when wheel - spin occurs , or you accelerate when accelerating down a hill.
M -Cars cars only have one automatic mode and therefore only a one setting for D -Modemode. (Called S in M - cars)
Rear-Axle Ratio
Gear-Change and Throttle-Blip calculation of the DCT needs to precisly know all Ratios in the DrivelineThe DCT's shift and throttle blip calculations need to know all the ratios in the drivetrain. If they are not setup set correctly, all the target RPM calculations are offsetted, which leads to spongy shifting and incorrect blipping will be off, resulting in spongy shifts and incorrect blips on downshifts.
| Note |
|---|
Adjust this option ONLY if you have fitted a different |
rear differential. NEVER change this on a stock |
car. |
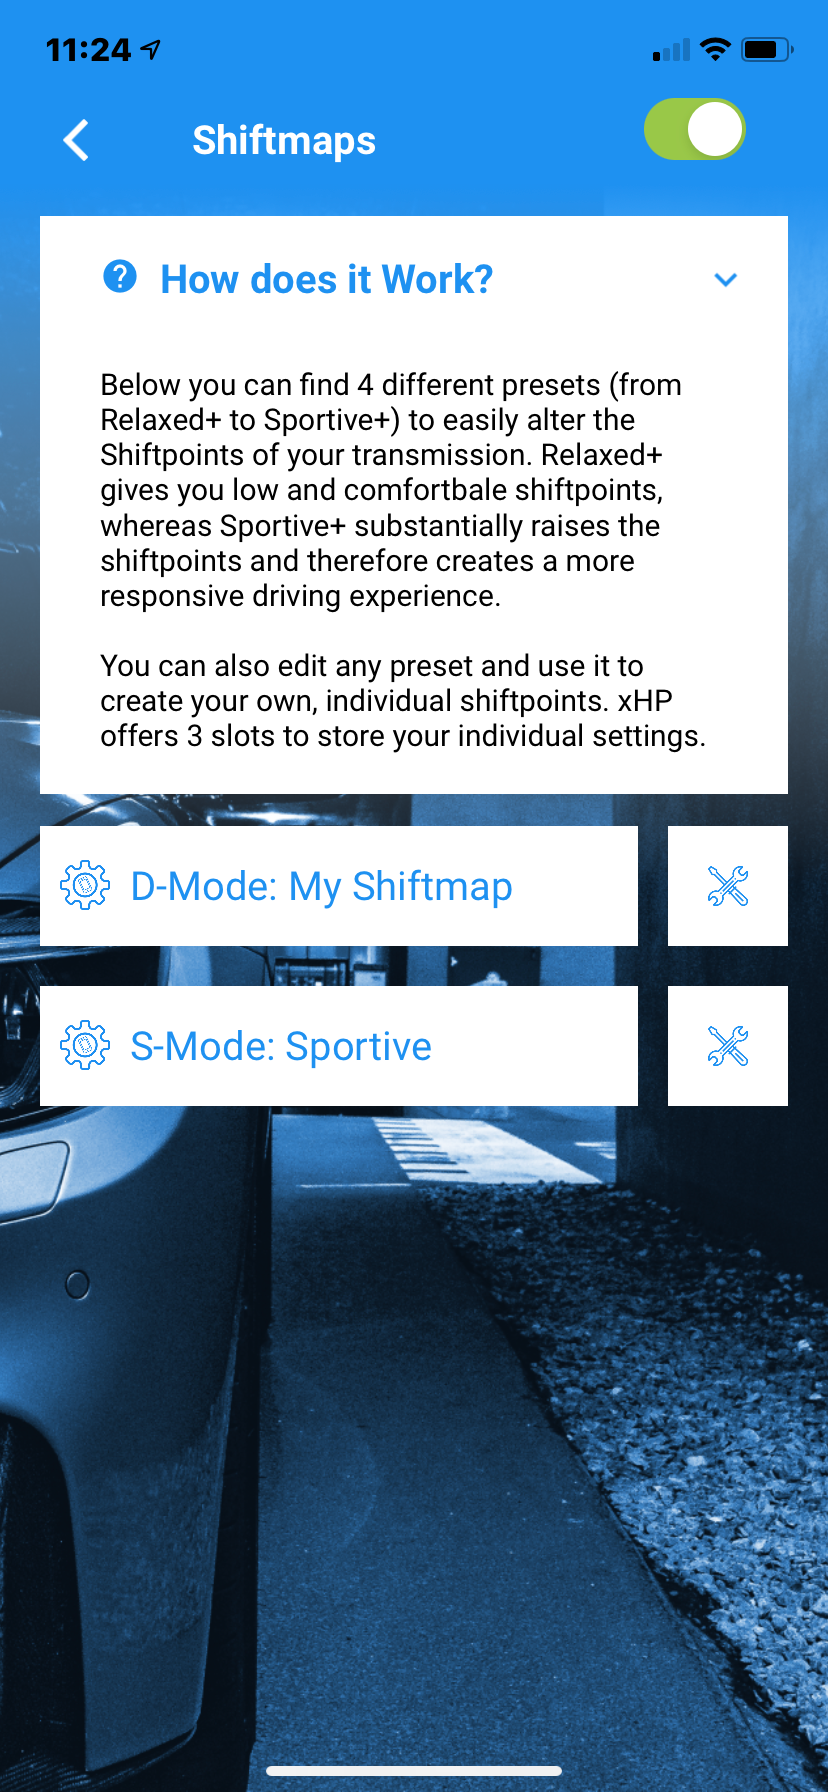
Shiftmap Editor with Presets
The shift map editor enables Shift Map Editor allows you to change all shift points in D- and S-mode to suit your personal likingpreferences. For instance example, you can make your car shift later from 1st to 2nd Gear gear when accelerating, or vice versa. Or make it hold 8th Gear for longer on the Highway when acceleratingkeep the car in 7th gear longer when accelerating on the motorway. For an easy start, xHP offers 4 presets: Relaxed, Relaxed+, Sportive Sport and Sportive Sport+.
Those These presets make it easy to do a quick test on your car and experience the changes. Just Simply select a preset and flash any map again. xHP will automatically apply the Presets presets to your Shiftmap shift map during the Flashflash. Presets work with your Stock Calibrationstock calibration, with all OTS Maps maps and with Custom Files custom files flashed.
Relaxed and Relaxed+: Your car will shift shifts up earlier up and will be is less eager to downshift when pressing you press the throttleaccelerator.
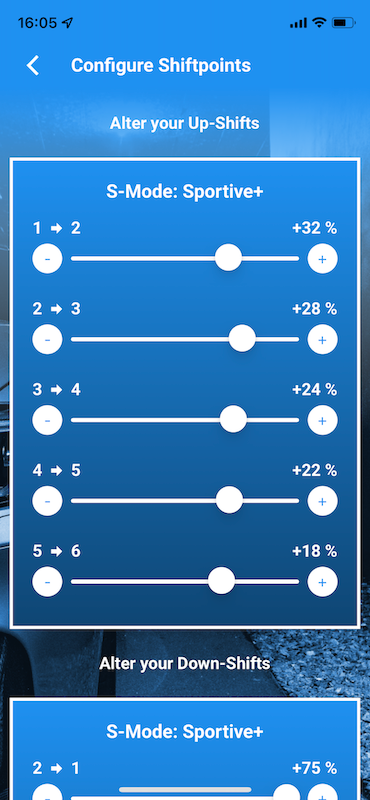
Sportive Sport and SportiveSport+: Your car will shift shifts up later and will stay for longer stays in lower gears longer. It will also react respond more quickly to throttle inputs and will be more happy willing to shift down.
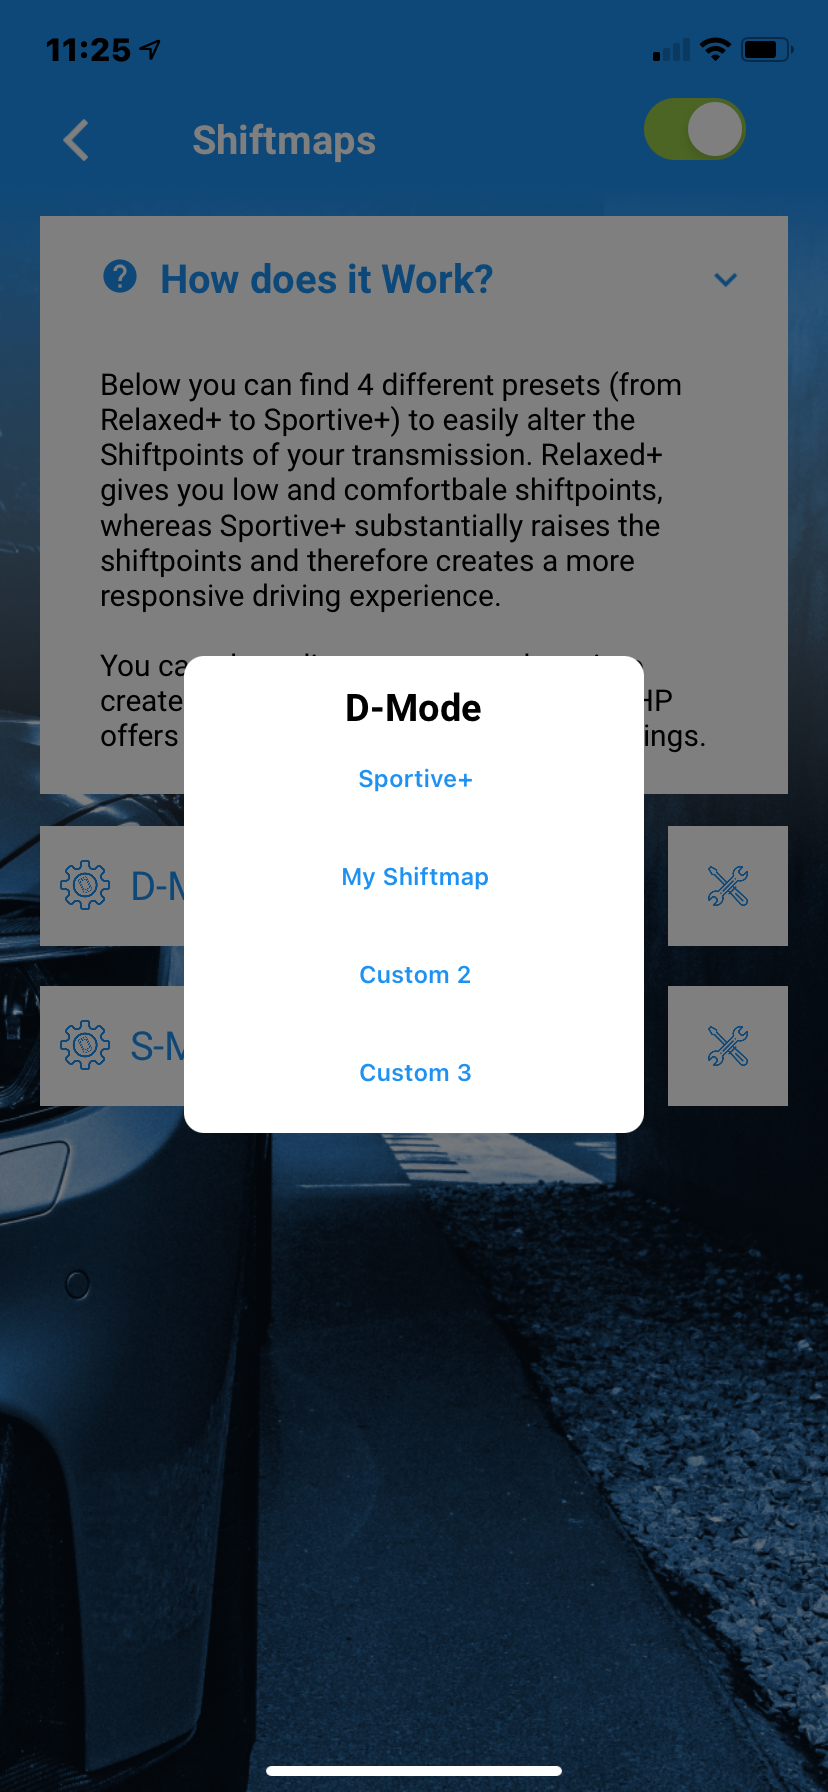
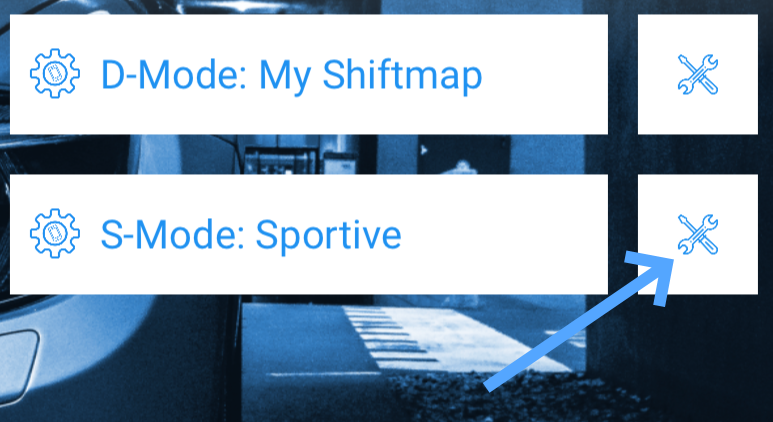
Shiftmap Editor: Editing Presets

For further
customisation, you can also edit any of the
presets and save your changes in up to three custom slots.
Simply select a
preset from the
drop-down list and click the
toolbox icon next to it. This will load the
preset into the
editor and reveal its saved settings. You can now edit each individual up- and downshift and
then save your
changes to
one of
the three custom slots.
The Presets itself will stay themselves remain untouched, so you can always revert return to them. Your personal slots Custom Slots are also get exported when using you use the Import/Export feature, so you can easily share them with other users!

Shiftmap Editor: Setup hints
The shift map editor enables Shift Map Editor allows you to change all shift points in D and S-mode to suit your personal likingspreferences. A “shift map” "shift map" consists of 12 lines , which are spread over across the throttle input.
Six for upshifting upshifts (1-2-3-4-5-6-7) and six for downshifting. downshifts (7-6-5-4-3-2-1) Up- . The upshifts and downshifts can be configured independently configured. The setting settings made in the editor are always relative to the flashed map. You do not set exact shift points, but rather are able to you can change the shifting of a given OTS or custom map! The spread range is from +50% to -50% for each shift. For example, if
| Panel | ||||||||
|---|---|---|---|---|---|---|---|---|
| ||||||||
Example: If your 5-6 shift |
normally occurs at 50 mph under light load, but you want it |
to |
occur at |
move the 5->6 slider to +10%. |
The same goes for |
downshifts. If your |
gearbox normally downshifts |
at 40 mph from 6->5 |
when coasting, but you want |
it to happen at 50 mph, pull the slider for 6->5 up to +25%. |
Be Make sure to you make sensible changes. If you alter the change 1-2 shift upwardsup, you should do the same gradually to with the subsequent shifts , to get a “natural” 'natural' shift - feel during while driving. Rule A good rule of thumb is to make bigger larger changes on in the lower gears , and smaller changes on in the upper higher gears.
However, you are free to experiment with these settings. xHP pre-calculates and validates all changes against every each OTS Map map stored on the deviceunit. A fixed ruleset gets set of rules is applied to auto-automatically correct "'wrong" ' settings and prevent dead-locks. Such a dead-lock deadlock could happen occur if your 2-3 upshift - point would be was set below the 3-2 downshift - point, or if an upshift would lead to result in a target RPM below engine idle- speed of the engine.
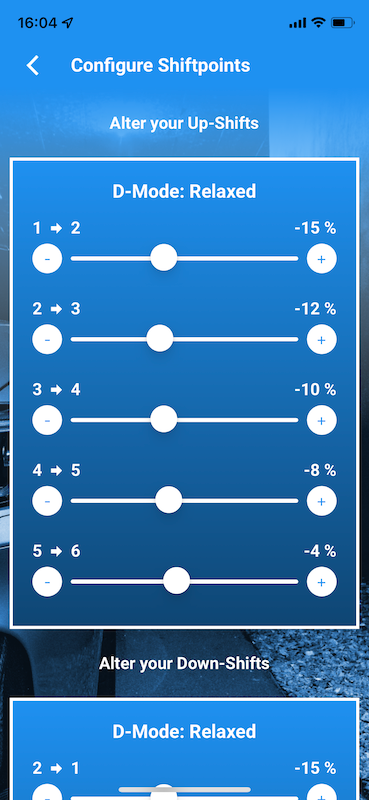
Below is an example of how to turn the standard Stage - 3 Map map of a 335i in D-Mode mode can be turned into a very comfortably comfortable and low-shifting Mapmap:
UPSHIFTS
1->2: - 24%
2->3: - 20%
3->4: - 16%
4->5: - 12%
5->6: - 8%
6->7: - 4%
DOWNSHIFTS
2->1: 0%
3->2: 0%
4->3: - 2%
5->4: - 2%
6->5: - 2%
7->6: - 2%
This is just an example, but users are encouraged to experiment and find their own personal best shift map. The Shift point Editor lets you change the character of a given map very much, by just pulling a few sliders.
Enable/Disable Creep
Choose Select whether your vehicle car starts moving/creeping by just releasing to move/crawl when the brake , is released or only when touching the throttle. “Standard” means accelerator is touched.
Default means that the flashed file will not get changed. “Enable” let’s file will not be modified.
Enable makes the car creep when releasing the brake , “Disable” means the vehicle will only move, when is released.
Disable makes the car move only when the throttle is applied.
Kickdown – Launch
For E-Series - 135i / 335i / Z4
You can select whether to use choose between a performance-oriented take-off behavior when going behaviour at full - throttle (incl. including Kickdown) or if "Burnout-Mode" shall be activateda burnout mode.
In Burnout -Modemode, the clutch will kick in is applied very aggressively , to immediately spin the rear - wheels immediately.
In Performance - Mode, the clutch will be is applied gradually to build up traction.
In both modes, you can choose the RPM, where select the rpm at which the clutch gets engagedengages.
This function feature can only be applied together used with our OTS Mapsmaps. It will does not affect behavior the behaviour on the Stock-Mapstock map! To use this function, please set DSC fully completely OFF, otherwise the Traction Control will kick intraction control will be activated.
| Info |
|---|
When Kickdown - Launch gets is activated, it is always active , when DSC is OFF and the car is not using the Launch Control feature. |
For F-Series - M-Cars
The DCT has 2 modes of full throttle/kickdown clutch - engagement when going Full Throttle/Kickdown at standstill, which are based on the current state of the DSC (Stability Controlstability control) is in. The stock setup is as follows standard setting on all F8x M-Cars is as follows:
In DSC ON mode the clutch engages gradually at around 1000 RPMrpm.
In DSC OFF mode it snaps engages at around 2800 RPMrpm. Depending on your personal setup and available traction available , you may want to change the RPM where at which the clutch starts begins to engage in each of the modes. For instanceexample, higher Traction traction (sticky track, Slicksslicks) means higher RPM revs are possible/necessary before braking traction. Also , cars with upgraded Turbos turbos can profit benefit from raising increasing the engagement - RPM.
Those Launch Modes These launch modes are NOT related to Launch Controllaunch control, which can be setup set in the " Launch Control " Panel panel in xHP.
If you have used Tools like tools such as MHD/bootmod3/MG-Flasher to deactivate disable Kickdown those , these modes (and Launch Control) do not will no longer work anymore. Kickdown needs to must be turned ON in the DME.
| Info |
|---|
When Kickdown - Launch gets is activated, it is always active , when DSC is OFF and the car is not using the Launch Control feature. |
Take Off in 2nd Gear as Standard
This option lets allows you to choose , wether whether the transmission uses first or second gear for take off starting from a standstill. This function is not active in the following situations:
Only active in with D-DriveLogic 1
The transmission will revert immediately returns to 1st gear when activating Kickdown (Emergency Function)kickdown is activated (emergency function).
During a cold start on some vehiclescars
On inclinesslopes
When the transmission is overheated
Valet-Mode
•limitsLimits your
vehicle's power to
approximately 100
hp in lower gears, and 130
hp in higher gears.
Limits max. RPM to approx. 2500-3000
(depending on vehicle)
•disables Kickdown
•inhibits too earlyDisables kick down
Prevents premature downshifting in
manual mode (max. 2500
rpm)
Locks the transmission in its slowest operating mode
•inhibits Launch Control/Brake-Boosting.
Safely lendDisables launch control
Lend your high-power performance vehicle to your kids children safely, or make sure the shop garage mechanic does not show - off with your car to his buddiesmates. Valet - Mode can be applied to any map and works safely in all driving environments.
Stop-Go
The Stop-Go function makes keeps the transmission stay in 2nd Gear at standstill gear when a traffic - jam situation is recognizeddetected. It's a comfort convenience function to avoid continuous cycling constant shifting between 1st and 2nd Gear gear in "Stopstop-Go" go situations. Users The user can choose whether to turn enable or disable this function ON or turn it OFF completely.
| Info |
|---|
Stop-Go: OFF ignores the traffic jam recognition detection and leaves lets the transmission cycling shift between 1st and 2nd gear. Stop-Go: ON does not mean that the transmission will use 2nd Gear always at standstillalways uses 2nd gear when the car is stationary. This is just only the case when the vehicle senses car detects a traffic - jam-like driving situation. If you want to use 2nd Gear gear as Standard standard for take-moving off, please use the respective appropriate Custom-Function. |
Back to the Overview Page.